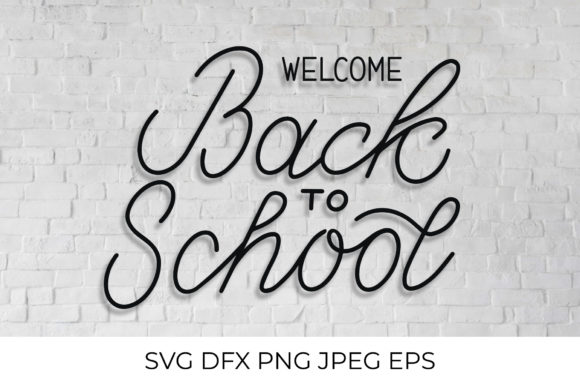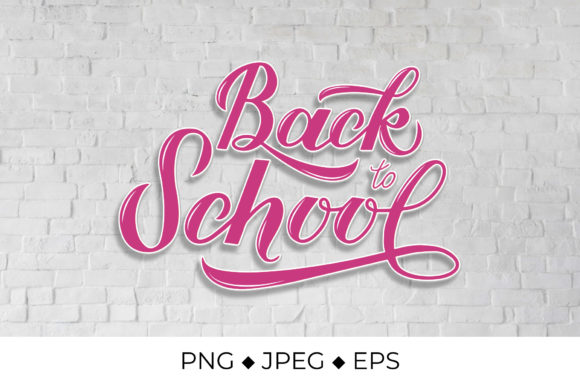
Elevating the Classroom Aesthetic: The Power of Back to School Calligraphy Lettering
There is something undeniably special about the start of a new school year. The crisp air, the unsharpened pencils, and the blank pages of a fresh notebook all carry a sense of possibility. For educators, parents, and creative entrepreneurs alike, one of the most visually compelling ways to capture that energy is through Back to School Calligraphy Lettering. This artistic approach to typography has moved far beyond simple handwritten notes. It now serves as a cornerstone for classroom decor, social media branding, printable resources, and even custom apparel. Understanding what makes this style of lettering so effective, and how to use it across various mediums, can transform a mundane school-related project into something truly memorable.
Whether you are designing a bulletin board header, crafting a set of motivational posters, or creating digital content for a school supply shop, the quality of your lettering matters. Calligraphy brings a warmth and personality that standard fonts often lack. It suggests care, creativity, and a human touch—qualities that resonate deeply during a time of transition like back to school season. But to get the most out of your designs, you need more than just a pretty script. You need files that work across different platforms and applications, and you need to understand the nuances of each format.
The Versatility of EPS Vector Files for Back to School Calligraphy Lettering
When you invest in a Back to School Calligraphy Lettering set, the EPS vector file is often the most powerful tool in the package. EPS stands for Encapsulated PostScript, and it is a format designed for scalability. This means you can resize the lettering from a tiny sticker all the way up to a large poster without losing any sharpness or detail. The specific file included in this listing is EPS 10, which is widely compatible with industry-standard software such as Corel Draw, Adobe Illustrator, and Inkscape.
Why does this matter for a back to school project? Imagine you are creating a large wall decal for a classroom door. You want the calligraphy to be crisp and clear from every angle. With a raster image like a JPEG or PNG, enlarging it too much can result in pixelation. An EPS vector, however, uses mathematical paths to define the shapes, so it remains pristine at any size. This is especially important for calligraphy lettering, where the delicate swashes, thick-to-thin strokes, and elegant flourishes need to maintain their integrity.
Working with an EPS file also gives you full control over color. Because it is a vector, you can easily edit individual elements in your design software. You might want to change the ink color of the lettering from a standard black to a vibrant school-spirit orange or a calming navy blue. With the EPS format, this is a simple task. For anyone who regularly produces classroom materials, handouts, or promotional items, having this level of flexibility is a game-changer.
PNG Files with Transparent Background: The Clipart and Digital Workhorse
While vectors are ideal for scalable printing and editing, the PNG file with transparent background is arguably the most convenient format for everyday use. This listing includes a PNG version of the Back to School Calligraphy Lettering, which means you can drop the design directly onto any background without worrying about an ugly white box surrounding it. This is invaluable for a wide range of applications.
Consider a teacher preparing a digital welcome slide for a smartboard. With a transparent PNG, you can place the calligraphy lettering over a colorful gradient or a photo of the classroom without any extra masking. The same goes for creating Instagram stories to announce the first day of school, designing stickers for a school event, or even uploading to a cutting machine for vinyl decals. The transparency allows the lettering to sit naturally on your chosen surface.
Another significant benefit is the resolution. These PNG files are provided at 300 DPI (dots per inch), which is the standard for high-quality print. This means that whether you are printing a small tag for a pencil pouch or a large sign for a hallway, the edges of the calligraphy will remain smooth and sharp. For digital use, the high resolution also ensures that the lettering looks crisp on retina displays and high-definition monitors. This makes the PNG format a true workhorse for anyone who needs to move quickly between print and digital workflows during the busy back to school season.
JPEG Files for Iron-On Transfers and Everyday Printing
Not every project requires a transparent background. Sometimes you need a straightforward image file that is ready to print as-is. The JPEG file included in this listing is specifically designed for applications like iron-on transfers. This is a popular choice for creating custom t-shirts for teacher appreciation week, school spirit days, or even personalized homework folders.
The JPEG format is universally recognized and can be opened on virtually any device. Because it uses an RGB color range, it is optimized for screens and many modern printers. When you use an iron-on transfer paper with a standard home printer, RGB files often produce more vibrant results than CMYK files intended for commercial offset printing. This makes the JPEG version an excellent choice for low-quantity, at-home projects where convenience and color brightness are key.
It is important to note, however, that JPEG does not support transparency. This means the background of the image will be white, which works perfectly for light-colored fabrics and papers. For darker surfaces, you would want to use a transfer paper designed for dark materials, or simply default to the PNG version if you need to cut around the design. Having the JPEG format available gives you another layer of flexibility, especially if you are in a hurry and need a file that just works without any software fuss.
Understanding File Packaging and Compatibility
All of the files described above—EPS, PNG, and JPEG—are packaged together in a .zip archive. This is a standard compression format that keeps everything organized and reduces download size. When you receive your Back to School Calligraphy Lettering set, the first step is to extract the archive using built-in tools on your computer or a free utility like 7-Zip or WinRAR. Once extracted, you will have access to all the individual files.
Before making a purchase, it is wise to confirm that your software supports the formats you intend to use. EPS files, for instance, require vector editing software such as Adobe Illustrator, Corel Draw, or Inkscape. If you only have basic photo editing software like a simple photo viewer or a limited online editor, you may not be able to fully manipulate the vector file. The PNG and JPEG formats, however, are far more universal and can be opened by almost any image viewer or editor, including Preview on Mac, Photos on Windows, and free tools like GIMP or Canva.
This leads to an important note: this listing includes only the design files. Any backgrounds shown in the preview images—such as t-shirt mockups, wood textures, or chalkboard effects—are for demonstration purposes only and are not part of the purchase. This is a common practice in digital design marketplaces, but it is worth keeping in mind when planning your project. The calligraphy lettering itself is what you are getting, and it is designed to be placed onto your own chosen surfaces.
Color Calibration and Realistic Expectations
One factor that often surprises new users is the variation in color between different devices. The RGB color range of these files is calibrated to look vibrant on screens, but the final printed output can vary. As stated in the listing details, colors may vary slightly from computer to computer and printer to printer. This is a reality of digital design and printing. The color calibration of your monitor, the type of printer you use (laser vs. inkjet), and even the paper or fabric you print on all play a role in how the final color appears.
To minimize surprises, it is a good idea to do a test print on a standard sheet of paper before committing to your final material. If you are using a professional printing service, they often have ICC profiles that can help match colors more accurately. For most back to school projects, a slight variation is acceptable, but if you are matching a specific school color, you may want to open the EPS file in Adobe Illustrator and adjust the color values manually using a Pantone or hex code reference.
Practical Applications for Back to School Calligraphy Lettering
Now that you understand the technical aspects of the files, let us explore some real-world scenarios where this lettering can shine. The versatility of having EPS, PNG, and JPEG formats means you are prepared for almost any creative task that comes your way during the back to school season.
Classroom Decor and Bulletin Boards
A welcoming classroom environment starts at the door. Using the Back to School Calligraphy Lettering on a bulletin board header instantly elevates the space. You can print the PNG version on cardstock, cut around the transparent edges, and pin it up. Because calligraphy has a handcrafted feel, it softens the institutional look of a classroom and makes students feel more at ease. Pair it with simple borders and student artwork for a cohesive display.
Social Media Graphics for Teachers and School Shops
For educators who run classroom Instagram accounts or for small businesses selling school supplies, eye-catching graphics are essential. A transparent PNG of calligraphy lettering can be layered over a photo of a neatly organized desk, a stack of books, or a chalkboard. The high resolution ensures it looks professional on mobile feeds. Use it for announcements like "Welcome Back," "First Day of School," or "Meet the Teacher" posts. The organic flow of calligraphy tends to perform well on social media because it stands out against the sea of standard fonts.
Custom Apparel and Spirit Wear
The JPEG file is perfect for iron-on transfers. If you are making t-shirts for a school club, a teacher team, or a parent volunteer group, you can print the design onto transfer paper and press it onto a shirt. The RGB color range helps maintain the brightness of the ink. For best results, use a light-colored garment to avoid transparency issues. If you need to apply the design to a dark shirt, consider using the PNG file with a white underlay or ordering from a professional screen printer that can work with vector files directly.
Digital Resources and Printables
Many teachers create their own printable planners, to-do lists, and motivational posters. The EPS file allows you to incorporate the calligraphy into a larger layout. You can scale the lettering to fit a header, change its color to match your theme, and export the final file as a PDF for distribution. This is especially useful for creating back to school gift tags, thank you notes for volunteers, or even custom bookmarks for students.
Stickers and Labels
For those who use cutting machines like Cricut or Silhouette, the PNG file with a transparent background can be imported directly into the design software. The high contrast of calligraphy lettering makes it easy to cut. You can produce stickers for laptops, water bottles, or classroom cubbies. Because the files are high resolution, even small-sized stickers retain the detail of the original calligraphy strokes.
Observations on Modern Workflows and File Choice
One of the most important qualities of a good digital design set is how smoothly it fits into modern creative workflows. The inclusion of EPS, PNG, and JPEG in this listing reflects an understanding that users have different skill levels and different end goals. A graphic designer working in Adobe Illustrator will appreciate the vector flexibility of the EPS file. A busy teacher printing resources at home will reach for the JPEG or PNG. A small business owner managing both print and digital marketing will use all three.
The key is to choose the right format for your specific task. If you need to scale the design significantly or edit the colors, start with the EPS file. If you are placing the design over a textured or colored background, use the PNG. If you are doing a quick print for an iron-on transfer, the JPEG is your best friend. Understanding these distinctions saves time and frustration, especially during the hectic back to school period when efficiency is crucial.
Another consideration is long-term storage and reuse. EPS vector files are future-proof in many ways. They are based on established standards and can be opened by a wide range of software. Even if you switch from Adobe Illustrator to Inkscape or another editor down the line, your EPS files will likely remain accessible. PNG and JPEG are also widely supported, but they are static raster images. Having the vector source file ensures that your Back to School Calligraphy Lettering can be adapted for years to come, whether for new classroom themes, updated marketing materials, or fresh apparel designs.
In practice, many users find themselves using a combination of all three formats within a single project. For example, you might use the EPS to create a custom layout in Illustrator, export a PNG for a social media post, and then use the original JPEG for a quick test print. The availability of all three formats in one purchase eliminates the need to convert files yourself, which often leads to quality loss or unexpected results.
Ultimately, the value of a well-crafted calligraphy lettering set lies not just in the beauty of the script itself, but in the thoughtfulness of its file delivery. When you have access to vector, transparent raster, and standard raster formats, you are equipped to handle almost any creative challenge. The back to school season is full of opportunities for expression, and having the right tools makes all the difference.
Whether you are a teacher aiming to create a warm and inviting classroom, a parent looking to personalize school supplies, or a creative professional serving the education market, investing in quality Back to School Calligraphy Lettering with comprehensive file support is a smart move. It saves time, expands your creative options, and ensures that your final product looks polished and professional. As you plan your next project, consider not just the style of the lettering, but also the technical foundation that allows it to shine across every medium you use.