Cat School and Book Planner SVG: A Practical Guide for Back-to-School Creators
If you have spent any time browsing digital design assets this season, you have likely come across the Cat School and Book Planner SVG bundle. It is one of those deceptively simple products that appeals to teachers, small business owners, sticker makers, and parents who want a cute yet functional back-to-school theme. The bundle typically arrives as an AI, EPS, SVG, JPG, and PNG file set, with a canvas size of 1920 px by 1280 px in each format, making it ready for both print and digital use. It sounds straightforward—download, open, edit, use. Yet the difference between a project that looks polished and one that feels off often comes down to small decisions made before the file ever touches your software. This article walks through common pitfalls people encounter with this kind of SVG set and, more importantly, how to sidestep them so you get the quality and usability you expect.
What the Cat School and Book Planner SVG Actually Offers
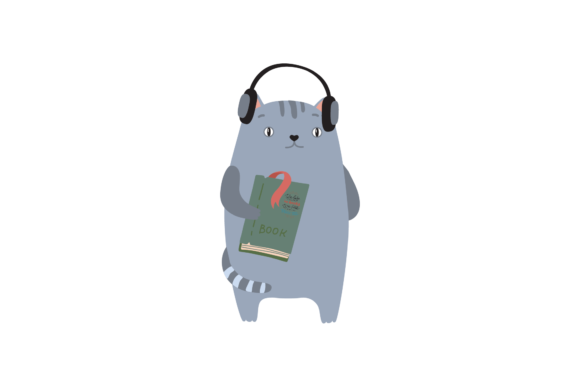
At its core, this design gives you a layered illustration that typically includes a cat motif combined with school or planner elements—books, pencils, apples, or calendar-style layouts. The purpose is to let you incorporate that theme into whatever you are building, whether that is a classroom handout, a sticker sheet, a planner insert, a social media graphic, or a small product listing. Because the files come in vector formats (AI, EPS, SVG) and raster formats (JPG, PNG), you have flexibility. Vector files allow resizing without quality loss, while the PNG gives you a ready-to-use transparent background image. The JPG works as a quick preview or low-file-size option. That variety is useful, but only if you understand which format fits your actual workflow.
A mistake many buyers make is assuming all five files are interchangeable. They are not. The AI and EPS files are intended for vector editing software like Adobe Illustrator or CorelDRAW. The SVG works for design programs and some cutting machine software. The PNG and JPG are for immediate use without editing. Knowing which file to open saves time and frustration.
Mistake One: Choosing the Wrong Format for Your Project
The most common error I see is someone downloading the bundle and immediately trying to open the SVG in a raster-based program like Photoshop, only to find the layers are not editable as expected. Or someone uses the JPG for a large banner and wonders why the edges look fuzzy. Each format has a purpose.
How this affects results: Using the wrong format can lead to lost time, poor print quality, or an inability to customize colors and elements. If you plan to edit the cat’s color or remove the book stack, you need a vector file. If you just need a quick image for a newsletter, the PNG or JPG will serve you better.
Better approach: Before you open any file, decide what you are making. If it is a sticker or a large poster, use the AI or EPS file for full editing control. If you are inserting the design into a Canva project or a Word document, the PNG with transparency is your best bet. If you need a small thumbnail, the JPG works fine. Match the format to the output, not the other way around.
Mistake Two: Overlooking the Canvas Size and Aspect Ratio
The bundle comes in a 1920 x 1280 px canvas. That is a 3:2 aspect ratio, which is common for presentations, social media headers, and some print layouts. But if you try to use it for a square Instagram post or a vertical flyer without adjusting, you will end up with cropping or stretching.
Why this matters: Ignoring the canvas dimensions can result in awkwardly cut elements or distorted proportions. The cat’s face might stretch, the books might look squashed, and the overall composition loses its charm. This is especially frustrating if you are selling printed products, because customers notice alignment issues quickly.
Practical advice: When you open the file in your vector software, check the artboard size. If your project requires a different dimension, resize the artboard first, then adjust the elements inside. Do not scale the entire canvas without checking proportions. Use the vector handles to move or scale the cat and book elements independently if needed. The design is easy to edit once you understand that the canvas is a starting point, not a fixed rule.
Mistake Three: Assuming the SVG Is Ready for Cutting Machines Without Checks
Many creators buy SVG bundles specifically for use with Cricut or Silhouette machines. The Cat School and Book Planner SVG looks perfect for vinyl decals, iron-on transfers, or cardstock cutouts. However, not every SVG file is optimized for cutting. Some contain stroke lines that need converting to paths, nested groups that confuse the software, or overlapping shapes that cause double cuts.
How this affects usability: If you import the SVG directly into Design Space or Studio and hit “go,” you might get a design that cuts outlines where you wanted solid shapes, or misses details entirely. That leads to wasted material and frustration.
What to check: Before cutting, ungroup the file and look for any shapes that are strokes rather than fills. Use the contour or weld function to combine overlapping parts. Test a small cut on scrap material first. The vector quality is good, but the file was designed primarily for graphic use, so it benefits from a quick cleanup before machine use.
Mistake Four: Not Checking Editability Before Buying
Digital products like this are usually sold as-is, and while the description says “easy to use and can be edited according to your needs,” that does not mean every element is unlocked. Some sellers bundle flattened layers, meaning the cat and book are merged into one shape and cannot be separated. Others provide fully layered files where each item sits on its own group.
Why this matters: If you need to change the color of the book cover but the file is flattened, you will have to trace the shape manually or recolor the entire image. This can take 15–30 minutes of extra work for a design that you thought was ready to customize.
How to avoid this: Look at the product images carefully. If the listing shows multiple color variations of the same design, the file is likely layered. If every image shows the same color scheme, ask the seller before purchasing. Many creators now include a preview of the layer panel. If you cannot see that, reach out. A few minutes of research saves hours of rework.
Mistake Five: Ignoring Licensing and Usage Rights
This mistake is not about technical file problems, but it affects your business or project just as much. The Cat School and Book Planner SVG is a digital product, and like most, it comes with a license. Some allow commercial use with a limit on the number of products sold. Others restrict use to personal projects only.
How this affects satisfaction: If you use a personal-use license to create items for your Etsy shop, you risk having your listings removed or facing copyright claims. That is not a scare tactic; it is a realistic outcome when platforms enforce takedown policies. Even if you see others selling similar items, each seller sets their own terms.
Better practice: Read the license text before completing the purchase. Look for keywords like “commercial use,” “print-on-demand,” “no limit on sales,” or “personal use only.” If the license is unclear, contact the seller. Keep a copy of the license after purchase. This is especially important for educators and small business owners who plan to incorporate the design into paid resources or products.
Mistake Six: Overlooking File Organization and Backups
The bundle delivers five files, often in a ZIP folder. A common oversight is extracting the files once and forgetting where they are saved, or worse, leaving them in the ZIP and trying to open them from inside the compressed folder. This causes errors, missing previews, and slow load times.
Why it affects efficiency: When you are in the middle of a project, hunting through downloads or re-downloading files because you lost them wastes time. It also increases the chance of opening an outdated version if you edited the file and saved over it.
Simple system: Create a dedicated folder for your SVG bundles. Name it clearly—“Cat School Planner Bundle” for example. Inside, keep the original ZIP as a backup, and create subfolders for “Original Files” and “Edits.” When you open the AI or SVG file and make changes, save the edited version separately. That way, if you need the original layout later, you have it.
Mistake Seven: Not Testing the Design in Your Final Medium
This one catches a lot of people, especially those new to digital products. You edit the file, it looks beautiful on your screen, you export it, and then when you print it or upload it, the colors shift, the resolution drops, or the alignment is off.
What is happening: Your monitor displays colors in RGB, but many print services use CMYK. The PNG file is RGB, while the AI file may default to CMYK. If you do not check your color mode, the bright blue cat could become a muddy gray in print. Similarly, the 1920 x 1280 px canvas is fine for web use, but for a large poster, you may need to scale it up, and the quality depends on whether you are using the vector or raster file.
Practical check: Before finalizing, do a small test print on your home printer or request a proof from your print shop. If you are using the design on a website, check how it looks on mobile and desktop at different screen sizes. The vector file gives you freedom, but only if you verify the output settings. Adjust the color mode in your vector software before exporting. This step alone prevents many disappointments.
Better Choices from the Start
The Cat School and Book Planner SVG is a genuinely useful asset when you treat it with the same care you would any tool. Start by checking the format against your project needs. Open the AI or EPS file if you want full control, the PNG if you need a quick transparent image, and the SVG if you are using it in a vector program or cutting machine. Verify the canvas size, and adjust your artboard before you begin designing. Confirm that the file is layered and editable, especially if you plan to recolor or isolate elements. Read the license to ensure your intended use is allowed. Keep your files organized, and always test your output before committing to a large batch.
If you take these steps, you avoid the headaches that come from mismatched formats, wasted materials, and time spent fixing problems that could have been prevented. The design is easy to edit, but only when you approach it with clear intention. Whether you are making planner stickers for students, a back-to-school banner for your blog, or a set of classroom decorations, the cat and book motif works well because it is both playful and functional. Your job is to make sure the technical side supports the creative side, and that starts long before you hit “open.”
The best users of digital SVG bundles are not the ones who download the most files. They are the ones who take five minutes to check what they have, understand what it can do, and then adapt it with purpose. Do that with the Cat School and Book Planner SVG, and you will get a design that serves your project cleanly, efficiently, and without last-minute surprises.